|
Handmade Rub
'n Buff Cream - Make Your Own!
Contributed By: Maylin
Fetters - NE
Be sure to use boiled linseed
oil as a binder or it will not dry after application.
Add a few drops of "Boiled
Linseed Oil" to some powdered pearls. Mix to a thick, paste
consistency. Store in an air tight container.
To use on a larger surface,
apply with a soft cloth, (I reccommend wearing rubber or laytex
gloves to protect your fingers from getting stained), or use
a Q-tip for smaller areas.
Embossing Powder - Create Your Own Colors!
Contributed
By: Mrs Anesha Marshall - England
Use clear embossing powder and Faerie Dust, Powdered Pearls,
or Pearl EX Powders and create beautiful colors of Embossing
Powder
In an empty embossing powder jar, mix and shake well, clear embossing
powders with what ever color you like of Faerie Dust, Powdered
Pearls, or Pearl EX Powders! You can get some really beautiful
effects by embossing with it!
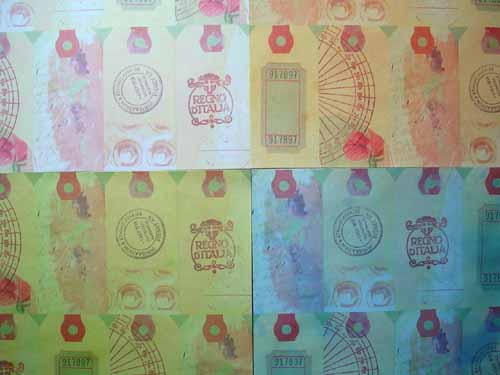
Mock Mulberry Paper
Contributed By Joyce Pacer
Due to necessity I came upon this idea when I needed mulberry
paper and was out. I used a cloth softener sheet that had been
used. First, I dampened it then rolled it with the needed color
using my brayer. The texture was great. I went one step farther
and crumpled up celophane wrap and used this to lightly sponge
the colored sheet with gold ink. It turned out very pretty and
brought abooout many comments in my little group. You do need
to wet the edges to fray. It doesn't tear as easily as mulberry
paper.
RECIPE ink for pads
TO MAKE REGULAR DYE
INK: (non-embossible)
To make the "ink" you'll need:
A baby food jar OR an old film canister
Rit POWDERED Dyes, in various colors
Rubbing Alcohol
Directions:
Baby Food Jar: Add your entire package of dye to the jar, add
alcohol to the top of the jar, replace lid and shake. Film
Canister: Fill canister 1/4 way full of dye, add alcohol to the
top, replace the lid and shake.
*You are not limited to the dye colors - mix a few and get new
and
different colors - just remember to write down how much you mixed,
so you
can do it again.
TO MAKE EMBOSSIBLE INK:
Homemade Rubber Stamp Ink
Powdered Clothes Dye (any color)
1/4 Teaspoon Alcohol
5 Tablespoons Glycerin
Mix dye with alcohol to the consistency of thin cream. Add glycerin.
Stir until well blended. This makes enough to replenish a stamp
pad several times. Pour ink over stamp pad or a foam-rubber pad
that is fine grained. To make the stamp pad you will
need foam rubber and a small plastic box with lid (such as a
travel soap box). Cut the foam rubber to fit inside the plastic
box. Spread the ink evenly with a brush or a tongue depressor.
FYI:
Use small sponges as ink pads. If you buy the compressed sponges…
you can cut them into thin strips prior to wetting and they will
become a nice thin ink pad!
– Barbie Boop <barbieboop1@JUNO.COM>
|
|
 |
Shadow Stamps - Make
Your Own!
Contributed
By: Sandy Wisnewski
This sample uses a stamp
from Rubber Riot.
Shadow stamps can be created
by cutting a piece of fun foam to whatever shape you want. Use
the various decorative scissors to create edges. These can be
mounted on HALOS or on wood blocks.
|
|
|
Mesh - Make Your Own!
Contributed
By: Janet Ciaramitaro
Making your own
homemade magic mesh!
To make your own mesh,
use wall repair tape
(get it at the hardware store). It's sticky on one side,
and you can use that stickiness to attach embossing
powder or glitter. Here, I used embossing powder on the
non-sticky side, then embossed to get a full, rich color. It
makes a GREAT new and interesting
background for your stamps - especially the "stitched"
and/or rustic types of stamps.
|

Stamp Artist - Janet Ciaramitaro |
Pyramid Boxes - Make Your Own!
Contributed
By: Kelley Rooks
PYRAMID BOX - Using Auntie Amy's pyramid box as a template, I traced it to the
back of the velvet paper. Cut out, embossed my design...I used
Judikins background stamp on navy blue suede paper. I ran the
template through the xyron machine with the adhesive backing...you
can substitute double stick tape and adhered it to the back of
the embossed suede. Punch holes in the suede at the top. Thread
through ribbon and tie in bow. (I put a matching gift tag with
the bow before I tied it.)
Gift Tags - Make Your Own!
Contributed
By: Kelley Rooks
GIFT TAG - I used a butterfly stamp with a piece of the scrap,
embossed, cut out, ran through xyron - can use double sided stick
tape. Used small gift tag - white. Sponged tag with navy blue
ink, used the victorian edge scissors for the bottom, and adhered
the butterfly to the front of the tag. punched a hole in the
upper left hand corner...and thread through ribbon.
Book Marks - Make Your Own!
Contributed
By: Kelley Rooks
BOOK MARK - I used a strip of the sued paper... embossed desired
images...used two cordinating panels slightly graduated sizes
and ran through the two small pieces through xyron, layered,
punched hole in top, and threaded through ribbon.
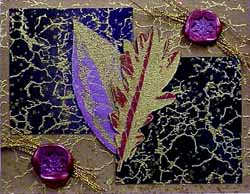
"No Wax" Wax Seals - Make Your Own!
Contributed
by: Debbie Shugerts
After a little
trial and error, I have developed a technique to make your own
'wax' seals. It's incredibly easy and less expensive then
using real wax seals. This technique uses plain glue sticks (low
temperature) and Pearl-Ex Powders.
1). First, ink up a stamp with your embossing pad or baby
oil. Be generous! Get the
entire underside of the stamp covered.
If you don't, the stamp may stick to the hot glue!
2). Squeeze a small amount of melted glue onto a glass
plate. Depending
upon the size of stamp I'm using, the
amount of glue varies from the size of a dime to the size
of a quarter.
3). Gently press your stamp into the soft glue. I find
that the touch is more
like laying the stamp onto the glue.
4). Wait a couple of seconds for the glue to set, then
remove your stamp. |
Stamp Artist - Debbie Shugerts
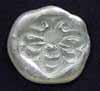
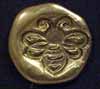
"No Wax" - Wax Seal examples
Contributed by: Debbie Shugerts |
|
5).
You should now have an impression of your stamp in the glue.
Now the fun part !
6). Brush Pearl-Ex directly onto your 'glue seal'. You'll
see your stamped image 'pop' into view.
7). Pop the glue seal off the glass plate and spray with
a little acrylic sealer.
The result is exactly like a wax seal.
The glue is more durable, and unlike wax, will not break. Your
color choices are unlimited - I love using Russet Red and then
a little interference Blue on my seals. The glue seals can be
attached to cards and envelopes with just a touch of glue. I've
also used a variation of this technique to make 'honey' for my
bee-theme cards. Looks great!
|
Tissue Paper Technique - Make Your Own!
Contributed
by: Jeane Cockey
I have a favorite technique
using tissue paper, cardstock and cheap plasticwrap.
Heat your dry iron on the
cotton setting.
1. Lay the cardstock on
a flat service covered with a brown grocery bag or newsprint.
2. Next, place a layer of plastic wrap on top.
3. Place a single ply tissue paper, cocktail napkin, or dinner-size
napkin on top.
Make sure the napkin is single ply.
4. Iron the whole thing being sure to iron near the edges of
the cardstock. The plastic will melt causing the
cardstock and napkin to become one. If the tissue paper/napkin
tries to come off the cardstock, apply a
little glue and let dry.
This can be folded, cut
into pieces for collage work, etc. I usually make a notecard
out of most of it and then use the scraps for collage.
You will get melted plastic
wrap on your iron. If you can, it may be best to devote your
iron to your craft area! Who irons clothes anyway?!!!!
A Great Card for Grandma!
Contributed
by: kloison - kloison@email.msn.com
1. Draw your child's hand on text-weight
paper. Cut it out carefully, being careful not to damage the
paper in anyway, either the positive or negative image. Both
can be used as a stencil. You will have 2 stencils
when you are done.
2. Place the negative part on the card stock so that you
will be stamping the hand part & masking the
background. Hold it in place or tape in place w/ removable double-stick
tape.
3. Using your small shadow stamps or your colorbox tool
kit, tile the hand w/ pigment ink: start off the
hand, on the stencil & stamp all the way across the hand
until you finish that row. Then start on the
second row. Repeating until entire hand is complete.
4. When done, choose a small stamp and a darker shade
of pigment ink. Stamp image on every other tile, so it doesn't
look too busy.
5. Remove paper stencil, and emboss hand in clear.
6. Roll over top w/ one of fiskars textured brayers. Wipe
hand off w/ paper towel, and mount as desired.
7. Now try this w/ the other stencil you created: the
positive hand shape. You'll be "tiling" the background
and the hand will be blank because it is masked. Stamp a cute
saying inside the hand when you are done.
8. This technique works well w/ any shape...hearts are
beautiful!
Need A Halloween Stamp? Make Your Own!
Contributed
by: kloison - kloison@email.msn.com
Take your harvest
pumpkin stamp. Stamp it in black or, if it is a solid, in orange.
Punch a triangle shape from Black Card stock (CS), and then use
your hole punch to punch a semi-circle on the edge of the triangle
punched shape. Place it up-side down on your pumpkin for evil
eyes, and right side up for happy eyes. For the mouth, Use the
Film strip punch on black CS. W/ scissors cut off the 2 ends
at an angle, placing it downward on the pumpkin for an evil smile
and upward for a happy one.
Antiqued paper - Make Your Own!
Make a cup of tea with a tea bag and let the bag steep for
five to ten minutes. Let cool and removed the bag. Gently squeeze
the tea bag. Then use the tea bag as a sponge to dab the stain
onto your paper.
Make a cup of strong instant
coffee and let cool. Paint your paper with the cooled coffee.
Depending on how diluted your coffee is will depend on how deep
of a stain you achieve.
Tissue Lamination - Make Your Own!
Brush liquid starch on white background paper. Place your
piece of colored tissue onto your paper.
Brush liquid starch over your tissue to blend your color.
Puffy Paint - Make Your Own
Supplies- Flour, Salt, Water, Tempera Paint
Mix equal amounts of flour, sale and water. Add any color liquid
tempera paint. Pour your mixture into a squeeze bottles. When
used, this mixture will harden to a puffy paint.
Shimmer Spray or Shimmer Paint - Make Your Own!
Shimmer Spray - Fill a spray bottle with water and add one
tsp.of mica powder, shake well and spray.
Shimmer Paint - Mix 1/4 tsp. of mica powder and 1/4 tsp
of glycerin (available at your local drug store),
and a drop of water, mix and paint.
Zim's
Wildflower Tie-Dyed Shirt! It's easy, it's cool, & it's so
Zim! - Make Your Own!
From Carolyn Crowder - ZimPrints |
|
Supplies
- Wildflower - 169-P, Hollow Leaf - 152-D
ZimPaint
- Yellow
- Green
- Light Green
- Black
- Foam Brushes
- Felt Scraps
- Wood Skewer or Tooth-Picks
- Stamp Positioner\
- 2 Spray Bottles
|
 |
|
Make a rainbow pad with
yellow & orange ZimPaint. Stamp the wildflower randomly following
basic fabric stamping instructions. Let stamped images dry to
the touch & heat set by ironing.
Easy Spray Tie Dye with ZimPaint - Make Your Own!
Pinch a piece of fabric
and tightly wrap a rubber band around it. Bundle areas of the
fabric that have wildflowers stamped on them. Then make other
rubber banded bundles randomly all over your fabric. The pinched
fabric will remain un-dyed, so a small amount of bundled fabric
will yield a smaller undyed area. A large fabric bundle will
produce a larger un-dyed area.
Spray a yellow ZimPaint solution over the entire piece of fabric.
Let the fabric drip dry for a while
(it doesn't have to get completely dry at this point)*. Remove
the rubber bands. Repeat the process,
bundling different areas of fabric, and use orange spray ZimPaint.
Each successive dyeing reduces the amount of remaining white,
un-dyed fabric. When you're finished tie dyeing, let the fabric
dry completely. Then, iron the dried item. Stamp the hollow leaves
as usual with full strength ZimPaint. When it's time to launder
the garment, wash it with like colors.
Tie Dye ZimPaint Solution - In a plastic spray bottle,
mix approximately 1/4 jar of ZimPaint with about 4-6 ounces of
warm water. Shake or stir well.
Embellishments
When you have achieved the look you want, you can branches. Sometimes
these help to break up a design & make it a little bit less
rigid or structured. Practice this first on scrap fabric: Dip
a toothpick or skewer into green ZimPaint. Holding the skewer
almost parallel to the fabric, drag it across the fabric. Begin
the dragged line in a stamped area and drag the toothpick or
skewer out of the design. Remember, you want an irregular, ragged
branch.
When the entire garment
is dry, heat-set by ironing on the wrong side or with a pressing
cloth.
You're done!
This is a fantastic technique
to use on napkins, place mats, & table cloths!
|
Tissue Paper Envelopes - Make Your Own!
From: Sandi
Marr - rubbereyes@earthlink.net
To make tissue paper envelopes
you will need Reynolds Freezer Paper, large blue carton in with
the Saran wraps, wax papers, etc. in your grocery store. Take
a sheet of tissue paper and wad the thing up, wrinkle the daylights
out of it. Now smooth it out nicely, but you do want these wrinkles
so don't get too carried away. Next, take a same size piece of
Reynolds Freezer wrap and place it wax side to the back of the
tissue paper. Iron, on the freezer paper, no steam, medium high
setting. Remember the waxy side of the freezer paper goes against
the wrong side of the tissue. The paper when heated fuses to
the tissue. Then you have one nice sheet of paper. You can make
envys from it, or use it for wrapping paper, backing on cards,
etc. Napkins, paper tablecloths, fabric, text weight paper, specialty
papers, and all work well
with this technique.
Tissue Paper Envelopes
Tissue paper Freezer paper Iron Scissors Envelope templates Step
1: Crumple up the tissue paper as
tight as you can in a ball. (Fancy napkins will work too)
2: Open up the tissue paper without
flattening it too much.
3: Cut a piece of freezer paper the
size of the tissue paper.
4: Place the shiny side of the freezer
paper on the tissue paper and paper clip the edges together (one
at each corner and one half way between on each side should be
enough)
5: Iron on low to medium setting.
The papers will stick together. If an area doesn't stick well,
heat again.
6: Cut to the desired size and shape. You can use
our envelope templates from our catalog. Or steam open an envelope
at the seams, and trace it on the freezer paper after ironing.
As a variation, use as
a full sheet, as wrapping paper .Use freezer paper or heat-n-bond
to fuse crumpled tissue paper that has been stamped on colored
card stock. The color will show through the stamped tissue paper
to make a nice textured card stock surface.
You're done!
Envelopes - Make Your Own! - Out of glossy magazine ads/layouts,
wallpaper, nearly any paper product is very popular and fun!
If you don't want to buy an envelope template, the simplest way
is to just make a cardboard template by opening an envelope the
size you want and trace around it. Overlay the template on the
paper of your choice, trace around it and cut out your envelope.
You can assemble your envelope with permanent glue. Or you can
make your own envelope glue for the flaps.
ENVELOPE GLUE RECIPE - Make Your Own!
Ingredients:
6 tablespoons white vinegar
(4) 0.1 oz. packets unflavored gelatin
1 tablespoon vanilla extract (or any flavor that you like)
Directions:
Bring vinegar to a boil in a small pan.
Add gelatin and stir until dissolved.
Add extract and stir until mixed.
Brush on thin layer onto back of an envelope flap...Let dry.
Moisten to apply.
Store excess glue in
a sealed container and melt again for future use by putting in
a pan of warm water.
Paper
- Make Your Own!
Submitted
by - Paula Jo
*When I am making paper from recycled junk mail or other sources,
I first shred or tear the paper into small pieces. Then I let
the paper soak overnight. The next day, I bring a large kettle
of water to a boil and add the soaked paper. I turn the heat
down to simmer and cover the kettle with a lid and let the paper
simmer for about an hour, stirring it about every 15-20 minutes.
Let the paper cool and then strain it over a large bowl. Don't
let the paper pulp go down the drain or it will clog up. After
the water has drained completely out of the water you can use
the paper just as you would the commercially made paper pulp
material. You can make this paper ahead of time and store it
indefinitely in a plastic bag in
the freezer.
*Another hint I have is to make your own molds for envelopes.
Get some of the vinyl (like for car seats) at the fabric store.
Trace the inside of your deckle on the vinyl and cut it out.
Next, center an envelope pattern onto the piece of vinyl and
trace around it. With an x-acto knife, cut out the envelope pattern,
being careful not to cut the "border" around the pattern.
Place this pattern in your mold and deckle to form perfectly
shaped envelopes. Paula Jo
SHADOW STAMPS - Make Your Own!
Supplied by Barbie Boop! 6/21/00
I made some last
night! took all of about 20 minutes! I used craft foam. cut out
the following shapes... square, rectangle, heart, oval. I used
my deckle scissors to cut them out! I then put Halos on the back
side of them and stamped with them! voila! shadow stamps! I am
going to make more tonight with straight edges AND i am going
to make some more the same shapes that are "frames"
just thought I'd share! Oh! I am also thinking that instead of
buying MORE pads.... I am just going to "stamp off"
then, stamp the image... that will give me the same effect. (i
tried it! )
hugs, Barbie
Stamp
Cleaner - Make Your Own!
From: Rosanne aka rockinstamper - rocky@netnet.net
Everybody probably has a recipe, but my favorite is a mix of
Simple Green and water which I keep in a spray bottle (recycled
from a pump hair spray) right on my stamp table It's probably
1/4 Simple Green to 3/4 water. I also use two painting pads in
a recycled foam meat tray--spray one with my Simple Green mix
and leave the other one dry. I swish the stamp around on the
wet one (it actually foams up), then on the dry one. I never
have a problem with the pigment ink; it even does pretty well
on permanent ink if I hit it right away!
You can find Simple Green in the auto section of your Wal-Mart
(I had to hunt it down, and that's where I found it). It's a
terrific all-purpose, environmentally sensitive non-toxic cleaner--and,
straight out of the bottle, does a fabulous job on those dirty
hubcaps and tires on your car! In fact, most guys seem to know
about it; I'm surprised they don't share it with the women in
their lives... (And no, I don't have anything to do with the
company that makes it--I just like having one cleaning product
instead of dozens...)
Hope this helps. If anybody
else uses Simple Green, or tries this, I'd love to hear what
you think.
Blender
Pen Re-Fill - Make Your Own!
Contibuted
by: Donna Forstner <stamper8@bellsouth.net>
For 1 ounce bottle fill
1/3 Glycerin
2/3 Distilled water
1/4 teaspoon alcohol
There are 6 teaspoons to a fluid oz. So to make the ink you will
use the following:
2 teaspoons of glycerin, 4 teaspoons of distilled water and 1/4
teaspoon of alcohlol.
Place above ingredients in a dropper bottle.
Embossing
Fluid - Make your own!
Supplied
by Barbie Boop! 5/20/00
When Your embossing ink pad needs to be re-juiced...Try this
recipe:
Mix and store in empty film containers or an empty Embossing
Fluid bottle the following ingredients:
Mix together in equal parts- 1 part glycerin and 1 part water.
Add a few drops of peppermint extract!(just for fun!)
Pour Embossing fluid carefully onto pad.... you may want to use
a make up sponge and dab the EF all around the pad.
GIFT BAGS!
- Make Your Own!
from: Barbie
Boop - kmaustin@freewwweb.com
Just use a book or a box or rubber stamp! that is smaller than
your paper and wrap it up like a present! (leave one side open
for the top of the bag!)
Wall paper, Card Stock,
Computer paper, Fancy Papers, Brown paper bag, Sturdy Gift wrap
are just some ideas of paper that can be used to make these bags!
Stamp on paper, use wall
paper or other pretty paper.
Lay the paper down on the table.
Lay a book or box or even a rubber stamp! on the paper.
Now start to wrap it like a present! You know how....(pull the
paper
around the sides of the book/box. tape or glue! fold up the bottom
(just
like a present)tape or glue!)
Remove the book/box
LOOKS LIKE A BAG!
Crease the sides and bottom!
trim the top of the bag with fancy scissors
Fill bag with goodies
Fold top of bag over
Use whole punch to punch 2 wholes
Tie Bag shut with ribbon bow
Or... you can make a stamped
folded card topper instead of tying a bow! oh! imagine making
them with vellum paper! oh my. what an idea! I made one using
a wood mounted stamp!
Make your gift bag a "for
keeps" gift! Stuff it with a small stuffed animal, dried
flowers, silk flowers.
Make them into a bridal or baby shower centerpiece! Or a party
favor!
|